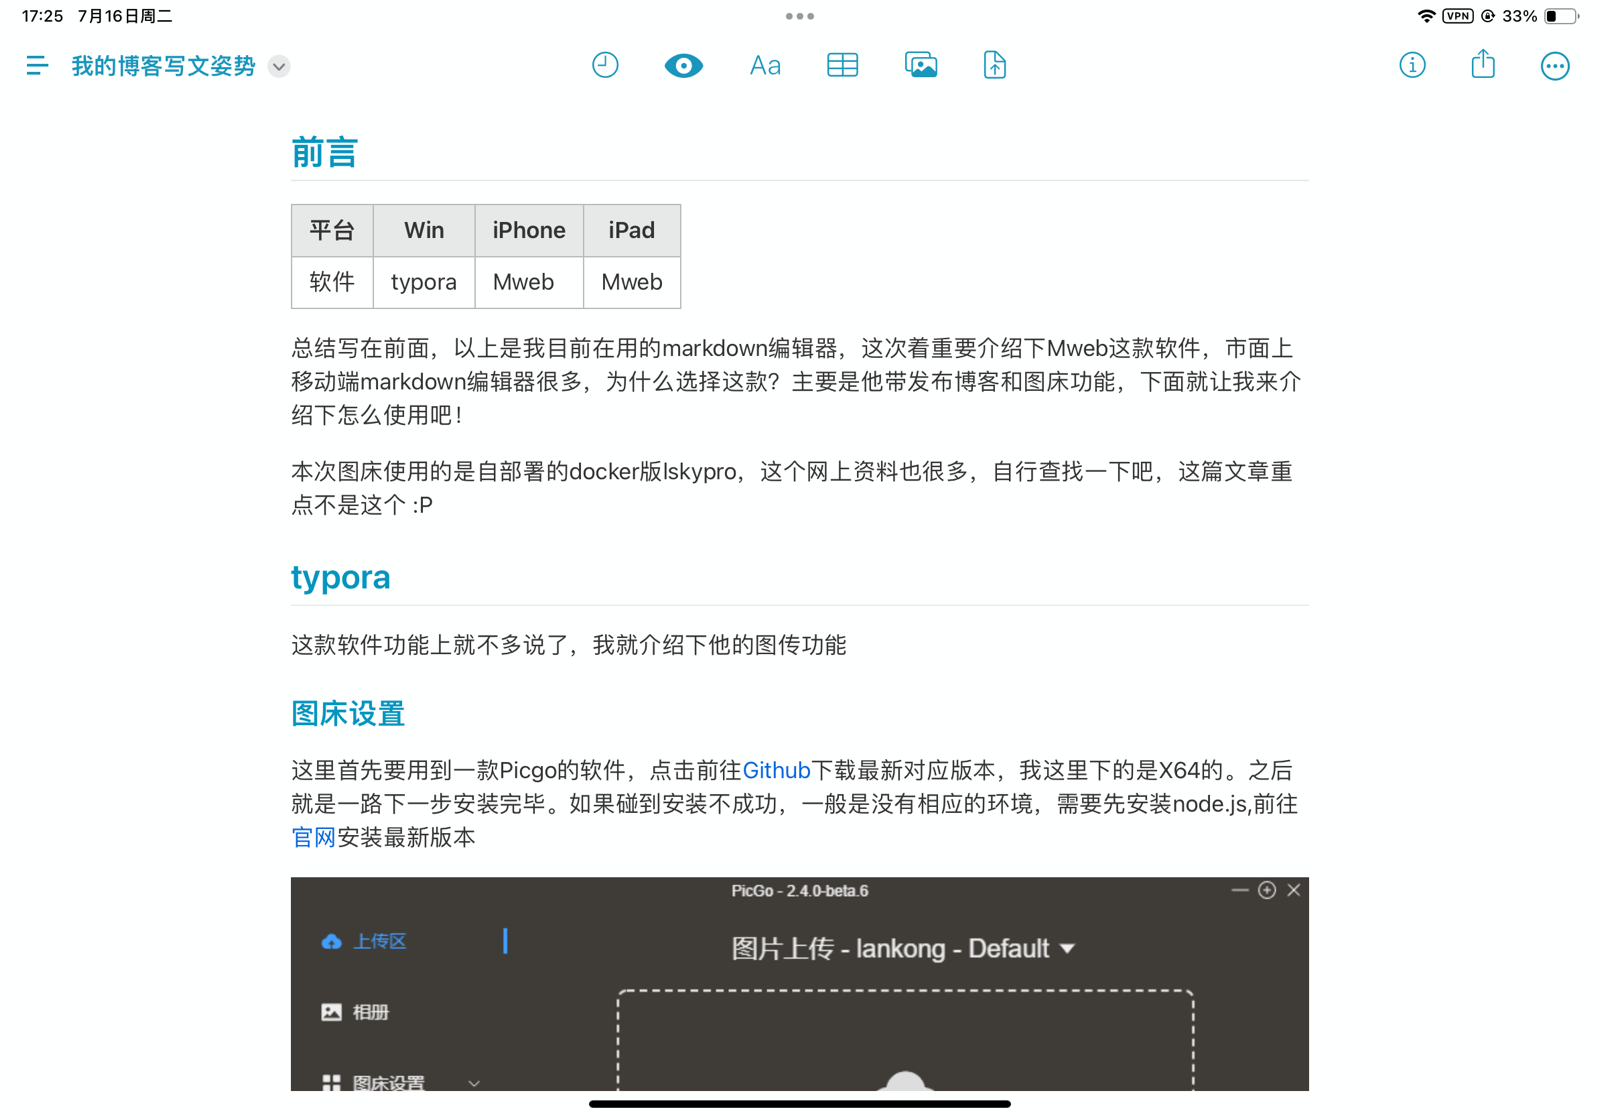
A quick overview
Here’s the setup I’m using right now for writing blog posts:
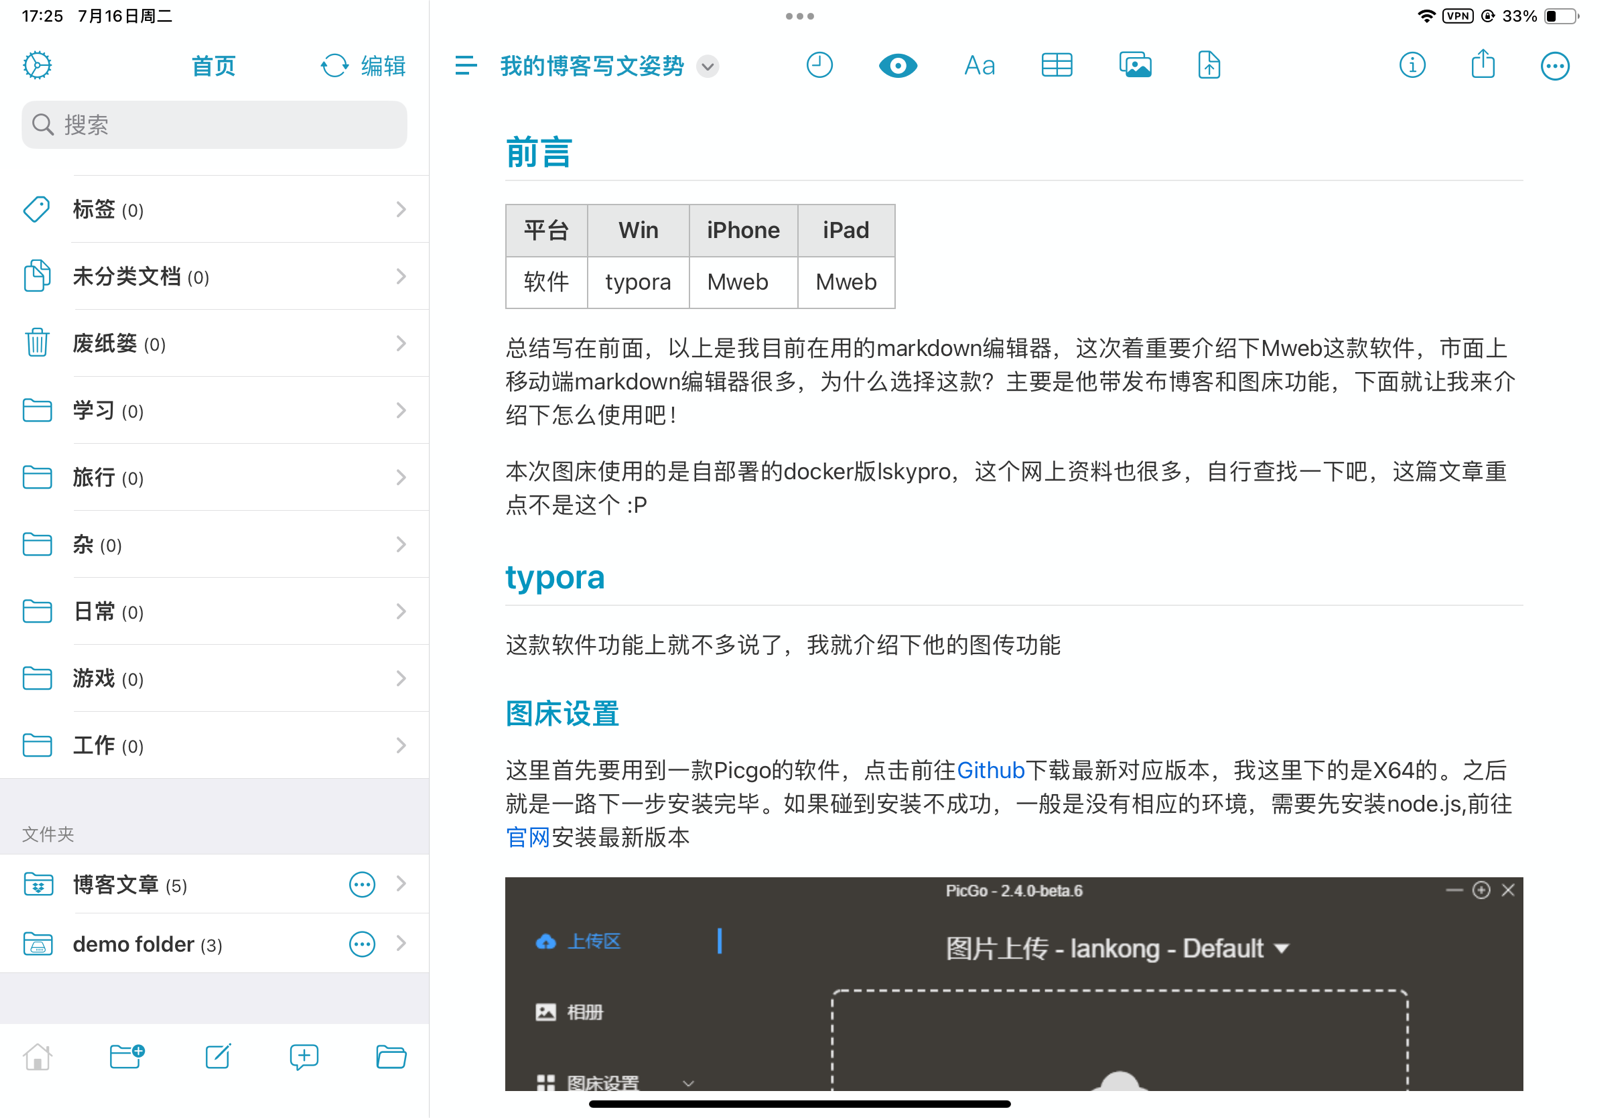
<table> <thead> <tr> <th>Platform</th> <th>Win</th> <th>iPhone</th> <th>iPad</th> </tr> </thead> <tbody> <tr> <td>App</td> <td>typora</td> <td>Mweb</td> <td>Mweb</td> </tr> </tbody> </table>That’s the short version up front. The main focus here is MWeb, because while there are plenty of Markdown editors on mobile, this is the one I ended up sticking with. The reason is simple: it combines blog publishing and image hosting support in one app, which makes it much easier to write and post from anywhere.
For image hosting, I’m using a self-hosted Docker deployment of Lsky Pro. There’s already plenty of material online about setting that up, so I won’t go deep into it here. The point of this write-up is how the writing tools fit together.
Typora
There isn’t much need to reintroduce Typora itself, so I’ll skip the basics and go straight to the image upload workflow.
Setting up image hosting in Typora
To make this work, you first need PicGo. Download the latest version that matches your system; in my case, I used the x64 build. Installation is usually straightforward. If it fails, the common reason is that the required environment is missing, so install the latest version of Node.js first.
Once PicGo is installed, add the plugin needed for Lsky Pro.
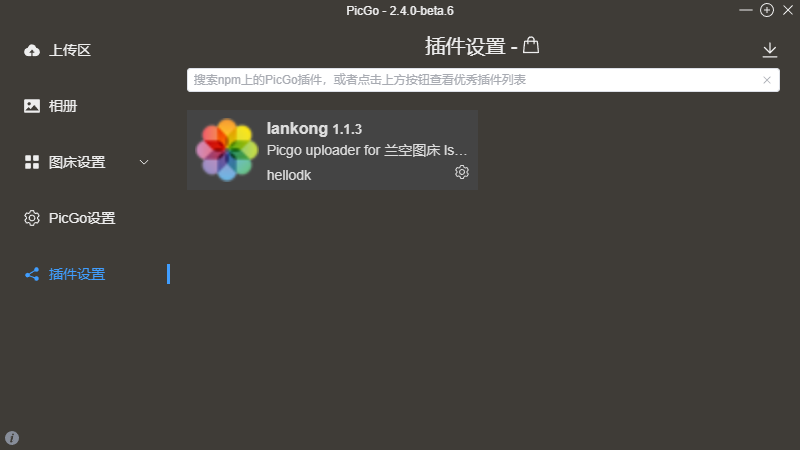
Install the plugin
Go to plugin settings, open the plugin dialog, search for lankong, and install it.
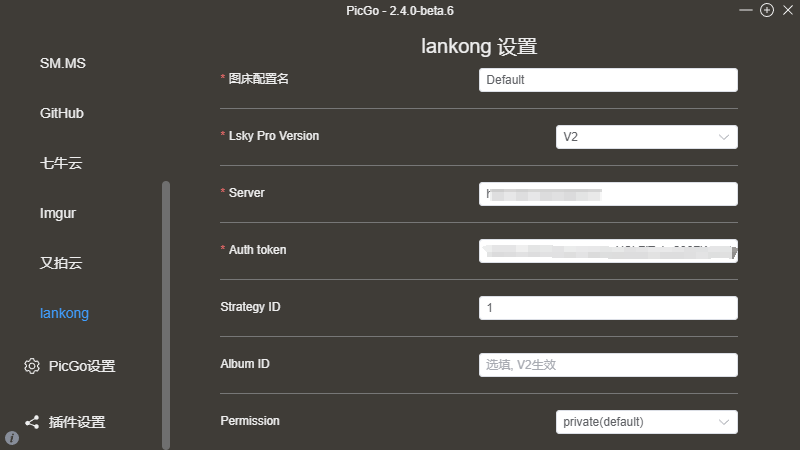
After that, open the image bed settings for the plugin you just installed. Fill in the required parameters, choose V2 as the version, enter your image host URL in Server, and then provide the Auth token from the next step.
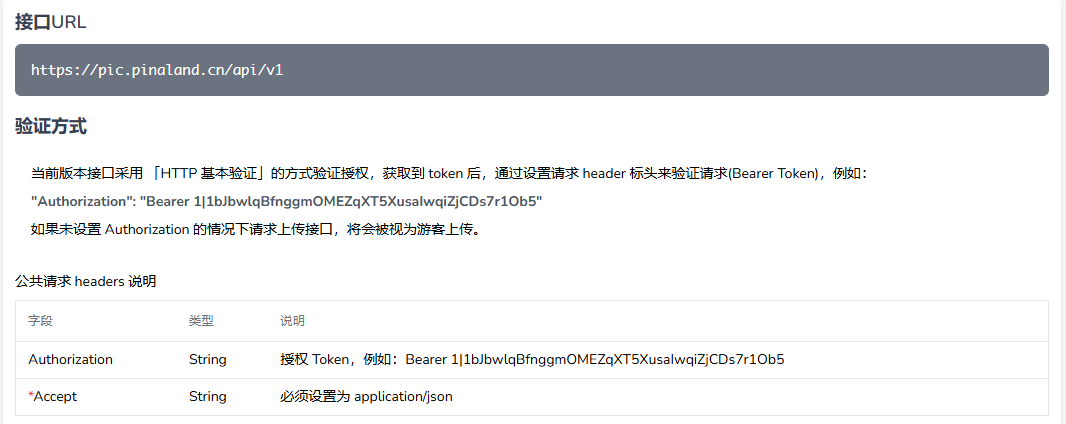
Getting the token
You can find the token instructions on your image hosting API page. I used Apipost here to test the request.
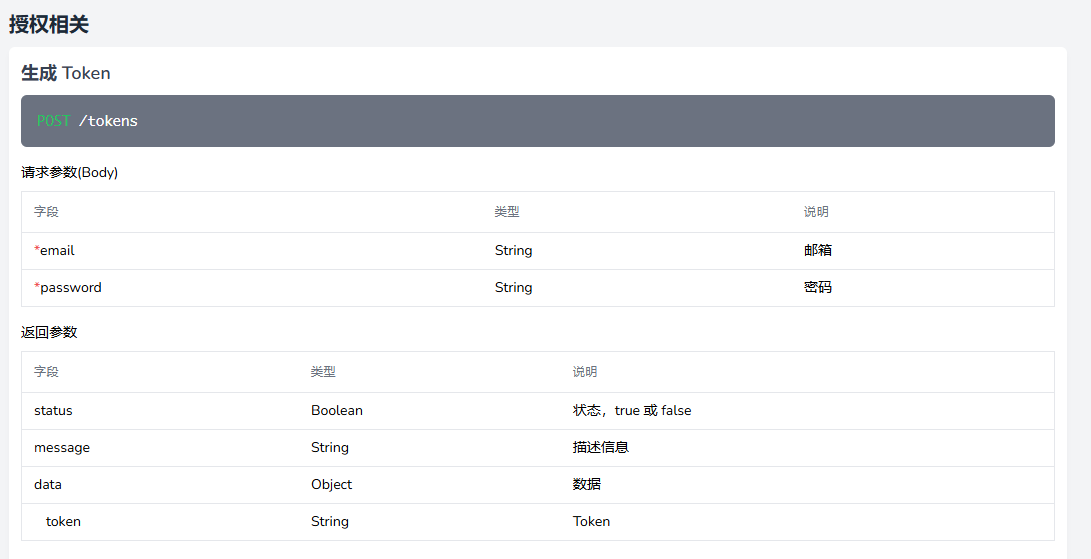

https://youdomain/api/v1/tokens    // 接口地址
Content-type:application/json    // header
email:图床账号                     // body
password:图床密码                // body
{
    "status": true,
    "message": "success",
    "data": {
        "token": "..."            // 这个就是你需要的token,填入就设置完毕
    }
}
Once you get the token, put it into PicGo and the image host is basically ready.
Typora settings
In Typora, go to:
File => Preferences => Image
Set the upload service to PicGo. After that, use the test button and make sure it reports a successful upload.
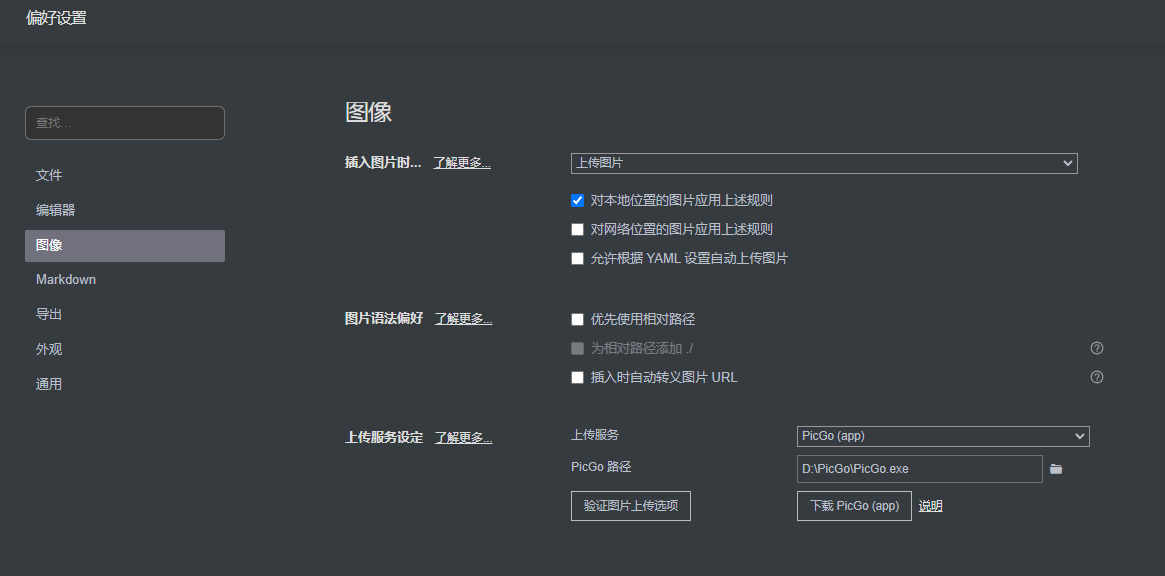
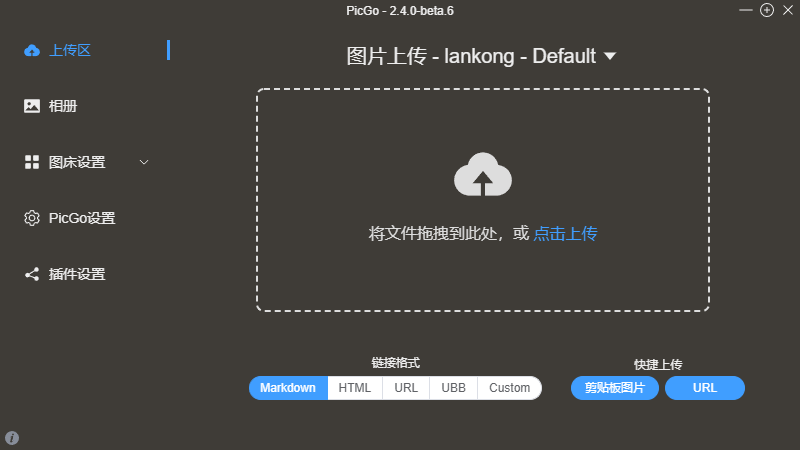
At that point, Typora becomes very convenient to use. Just drag an image into the document, it uploads automatically, and the local image reference is replaced with the URL from your image host.
MWeb
In principle, the first priorities are a clean interface and high performance; only after that come power, ease of use, and completeness.
That description feels accurate in actual use too. The interface is very clean. It supports Markdown syntax—obviously—and also supports LaTeX. More importantly for me, it includes both publishing and image hosting features, which is exactly what makes writing on the go practical.
Interface
The layout is split into left and right sections: a file panel on the left and the article on the right. The editing area itself can also be divided into editor and preview, so you get a what-you-see-is-what-you-get style workflow.

Publishing posts
The publishing setup is fairly simple. My blog uses Typecho, so in MWeb I chose the MetaWeblog API option and used this endpoint:
https://youdomain/action/xmlrpc
That’s really the key part for the publishing side.
Setting up image hosting in MWeb
This part takes a little more work than Typora.
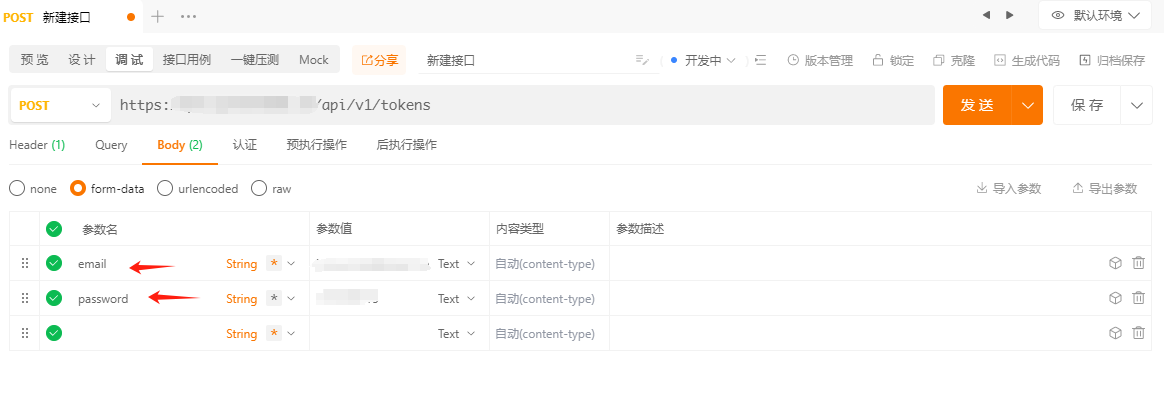
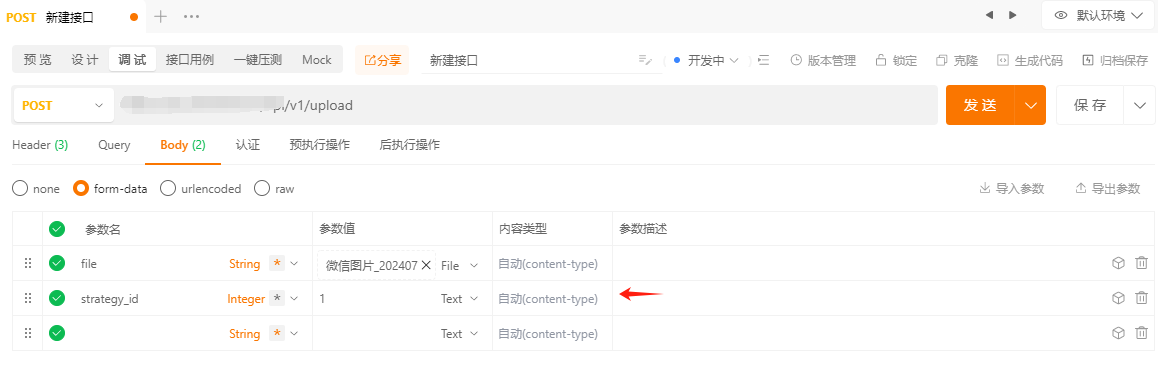
MWeb doesn’t include direct Lsky Pro upload support out of the box, but it does support custom API-based image hosting, which is enough. I used Apipost again to test the upload request first.
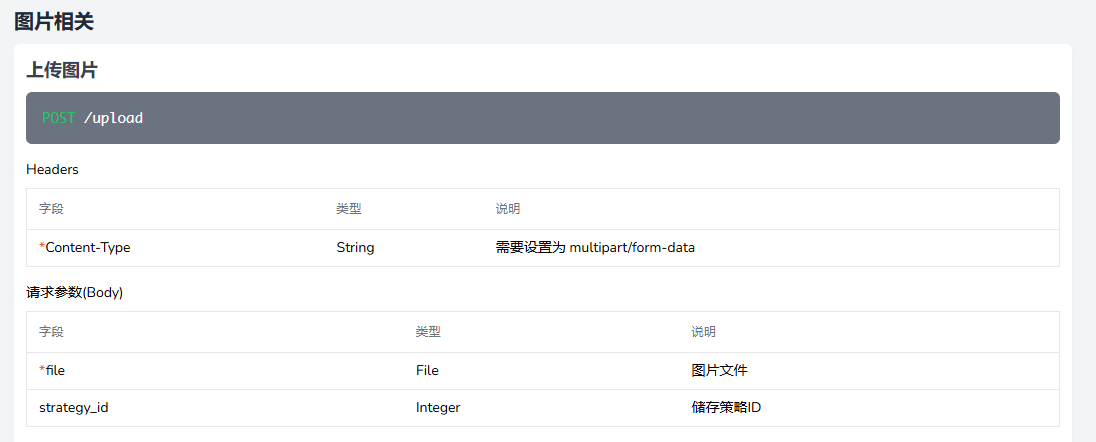
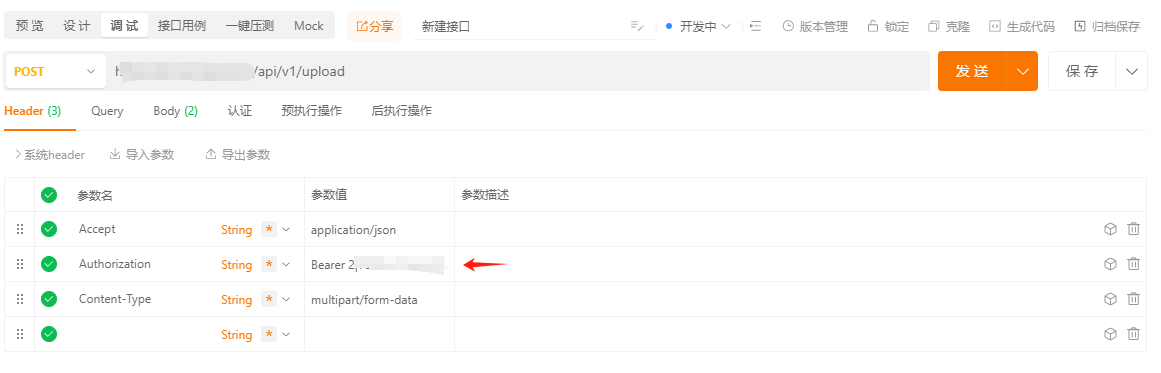
The important part here is that the token you obtained during the Typora setup needs to be placed in the request headers. Also, file is the key for the image being uploaded.
https://youdomain/action/api/v1/upload    // 接口地址
Authorization:token                        // headers
Accept:application/json                    // headers
Content-Type:multipart/form-data        // headers
file:上传的图片                             // Body
strategy_id:1                            // 储存策略
{
    ”status“: true,
    ”message“: ”上传成功“,
    ”data“: {
        ...
        ”links“: {
            ”url“: ”...“,    // 返回的地址
            ...
        }
    }
}
After you send the request and get a response, the main field you care about is url. Once that’s clear, the MWeb configuration becomes straightforward.
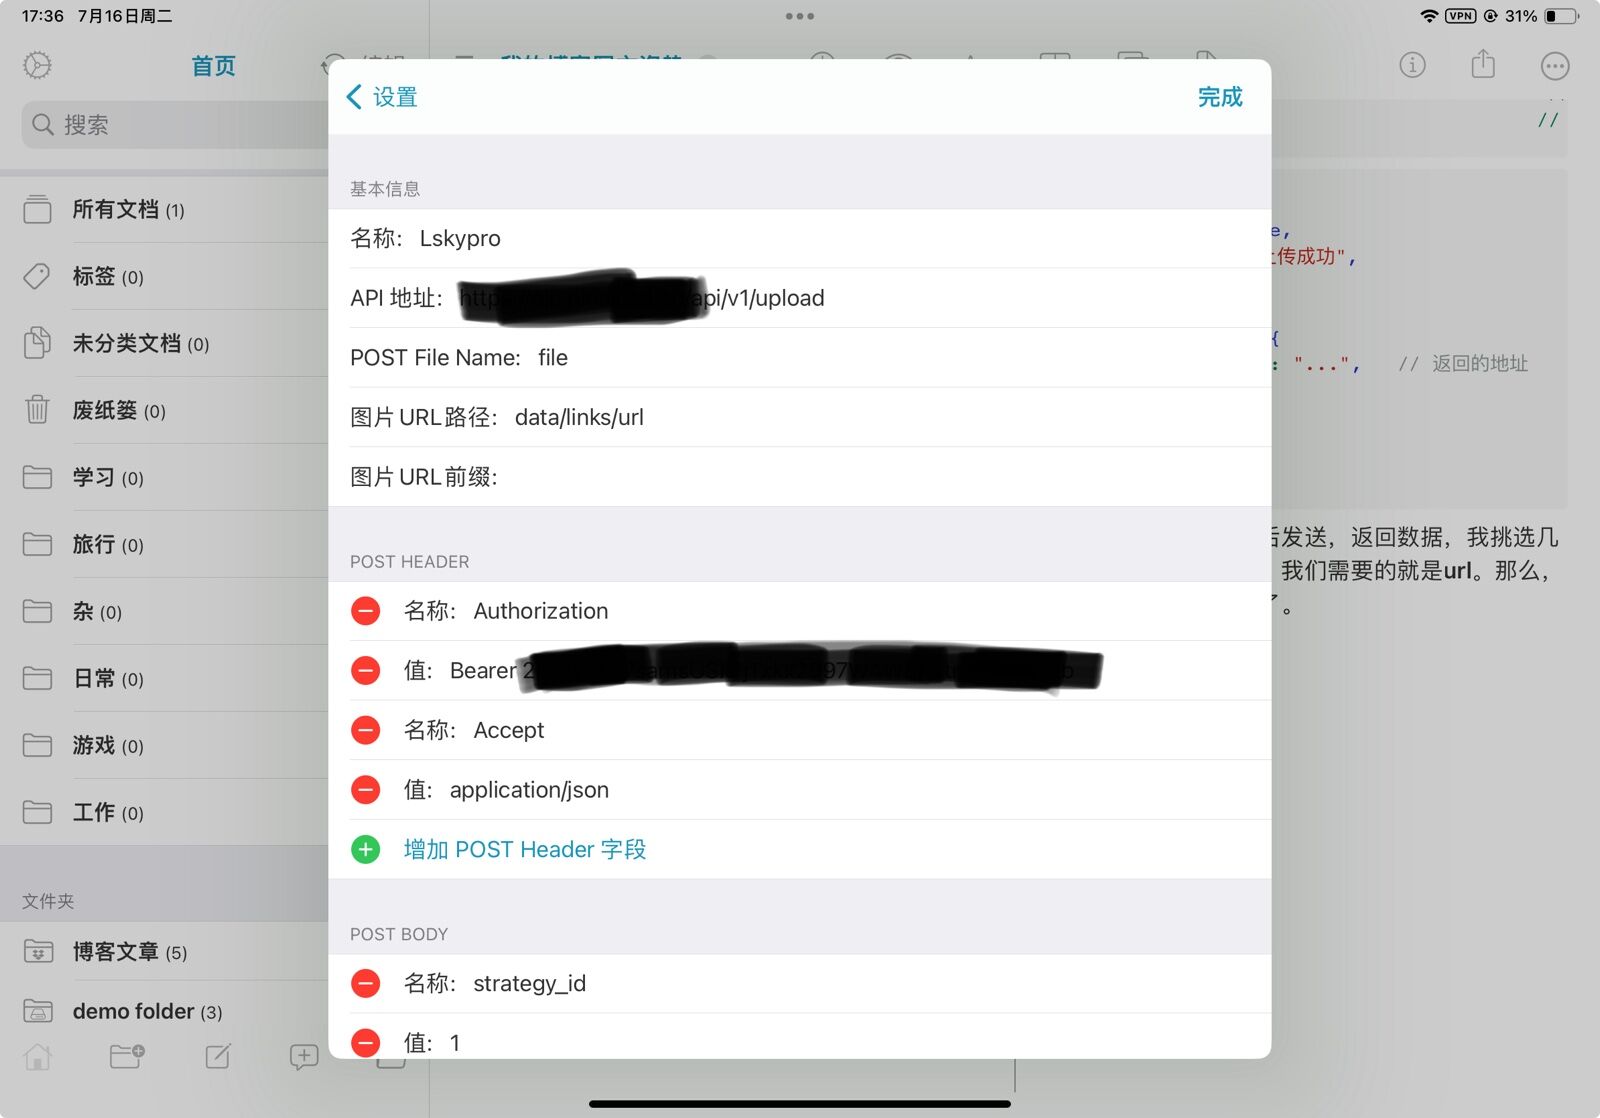
Three settings are worth clarifying:
- POST File Name: this is the parameter name for the uploaded image. Based on the API, it should be
file. - Image URL Path: this is the path to the image URL in the returned JSON. Here the URL is inside
data -> links -> url, so the value should bedata/links/url. - Image URL Prefix: this is only needed when the API returns a relative path and you need to prepend a domain. In this case the API already returns an absolute URL, so this field can be left empty.
One extra note: I did not keep Content-Type:multipart/form-data in the final MWeb configuration, because it caused an error. Removing it solved the problem.
After finishing the configuration, use the test function. MWeb will upload a demo image to your image host. If you can see that image, the setup is working.
A practical note on syncing
This post itself was put together using both MWeb and Typora, and finally published from my iPad.
There is one issue I ran into during actual use: because of iOS app sandbox restrictions, MWeb cannot sync the articles stored on my NAS as cleanly as I’d like. I can open individual files, but I can’t mount the whole folder as a file tree in the same way.
The workaround that ended up being usable was to sync the NAS and Dropbox through Cloud Sync, then let MWeb work from the Dropbox folder. In practice, that works pretty well. On mobile, I can write normally and the content syncs back to the NAS with very little friction.