After working with the ListView control, the next useful control to look at is DataGrid. Whether in ASP.NET web development or WinForms desktop applications, DataGrid-style controls are used very often. Their main purpose is straightforward: display data in rows and columns, while still allowing flexible control over how each field is shown and edited.
This example focuses on the WPF DataGrid and several common tasks: defining columns, binding database data, using a ComboBox column, controlling selection behavior, and saving edited data.
DataGrid column types
By default, once the ItemsSource property is assigned, a WPF DataGrid can automatically generate columns according to the bound data. WPF provides several built-in column types for different kinds of content.
When creating a DataGrid, the AutoGenerateColumns property determines whether columns should be generated automatically. If a DataGrid contains both auto-generated columns and manually defined columns, the custom columns are created first.
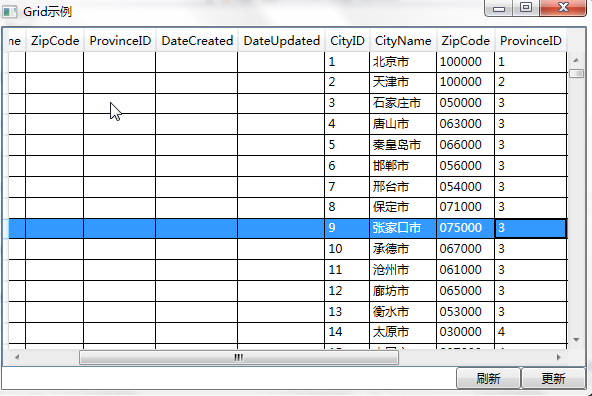
Building the DataGrid interface
Create a WPF window named WindowGrid in Visual Studio 2013.
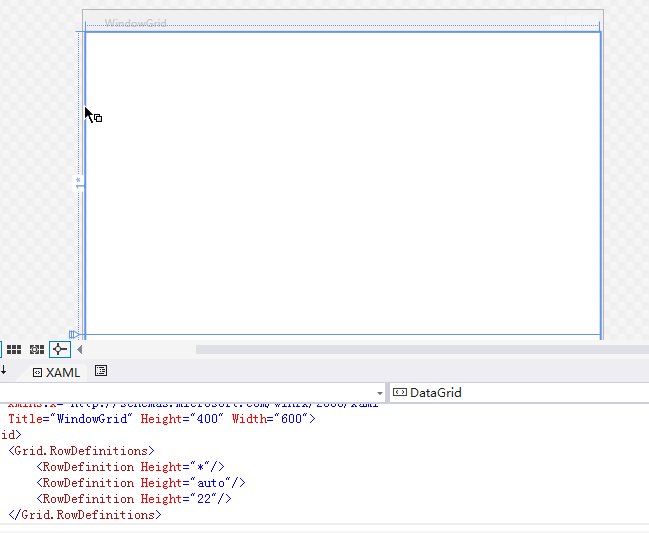
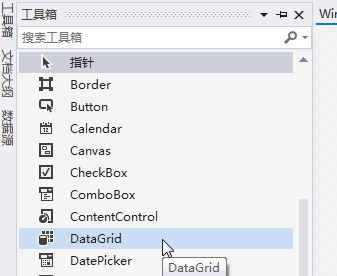
Next, locate the DataGrid control in the Visual Studio toolbox and double-click it to add it to the window. At first, the DataGrid appears as a small box on the form. Compared with the familiar WinForms DataGrid, the WPF version may look quite different before columns and data are configured.
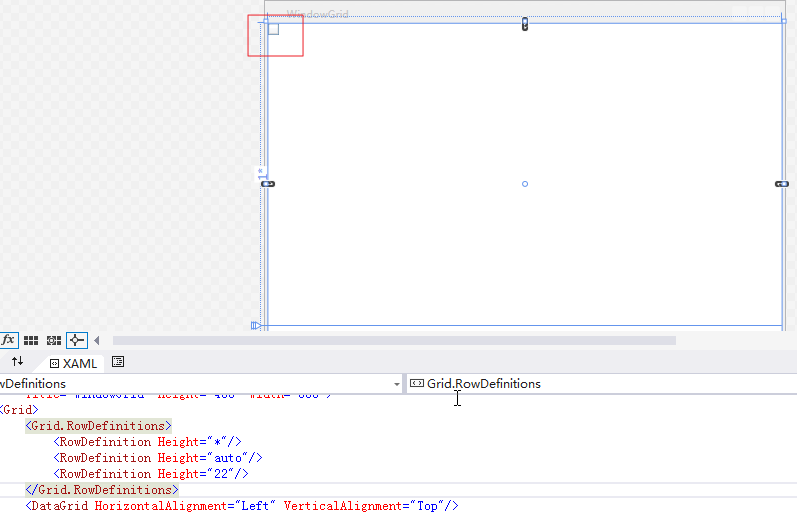
To add columns, select the small DataGrid box on the window, then open the Properties panel on the right side of Visual Studio 2013.
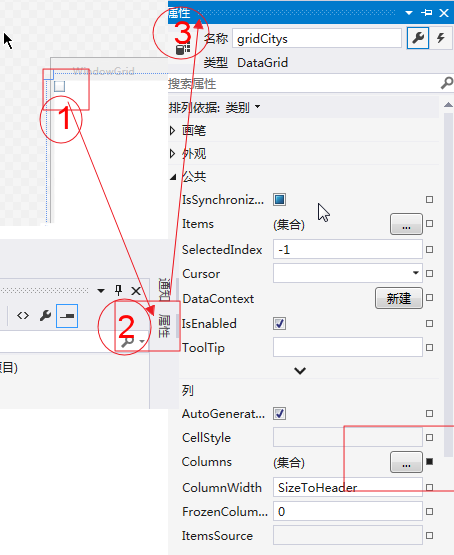
In the Properties window, click the button on the Columns row. A column editor dialog will appear.
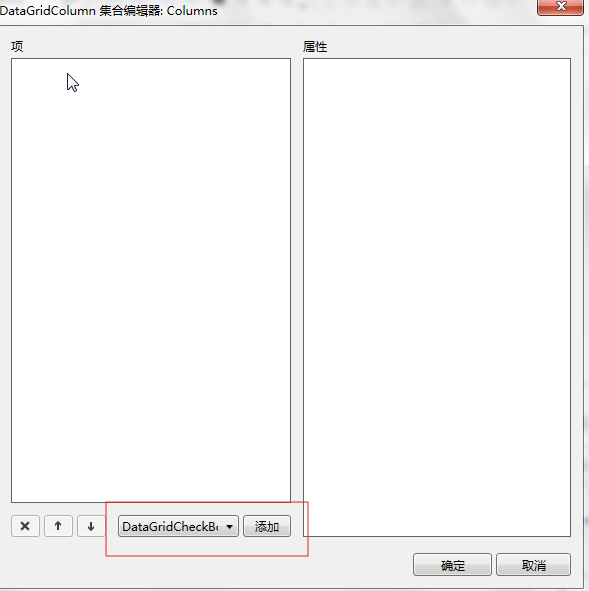
Choose the required column type and click Add.
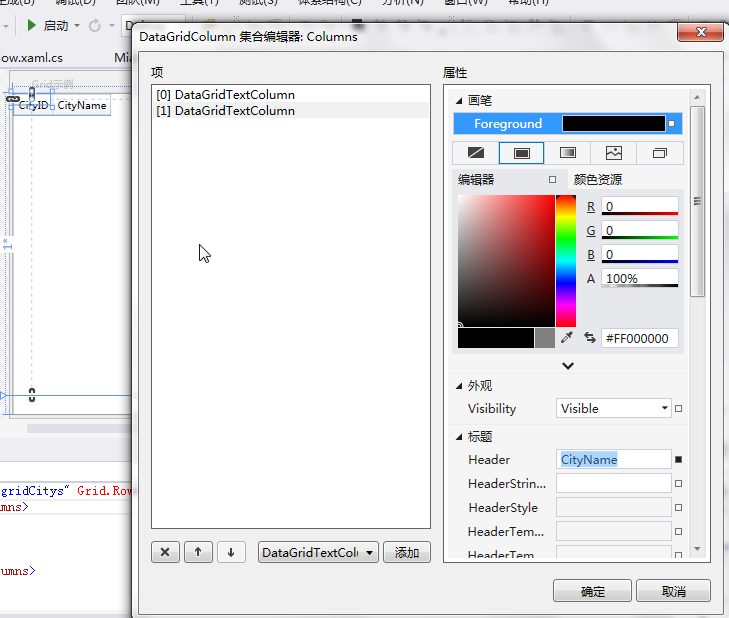
In this example, five DataGridTextColumn columns and one DataGridComboBoxColumn column are added. After these columns are created, the control starts to look much closer to a traditional DataGrid in WinForms.
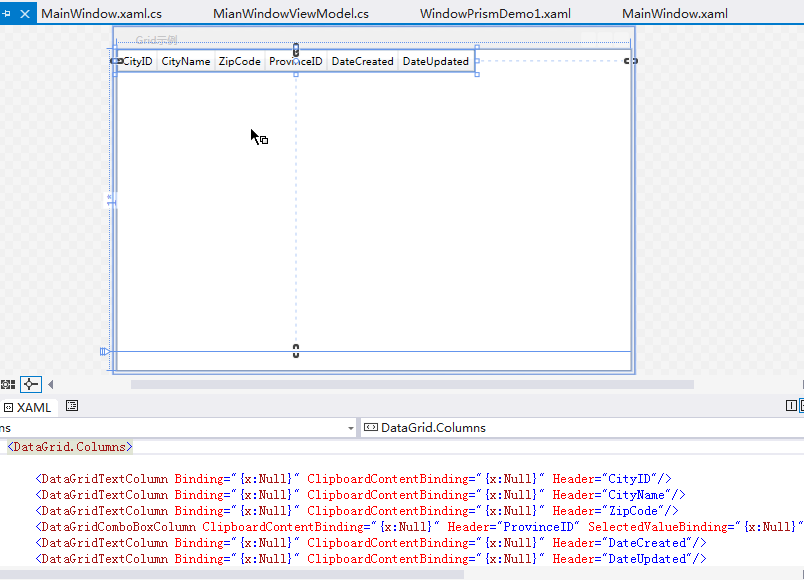
The completed XAML for the window is as follows:
<Window x:Class="WpfApp1.WindowGrid"
        xmlns="http://schemas.microsoft.com/winfx/2006/xaml/presentation"
        xmlns:x="http://schemas.microsoft.com/winfx/2006/xaml"
        Title="Grid示例" Height="400" Width="600">
    <Grid>
        <Grid.RowDefinitions>
            <RowDefinition Height="*"/>
            <RowDefinition Height="auto"/>
            <RowDefinition Height="22"/>
        </Grid.RowDefinitions>
        <DataGrid x:Name="gridCitys"  Grid.Row="0" HorizontalAlignment="Left" VerticalAlignment="Top" AutoGenerateColumns="False">
            <DataGrid.Columns>
                <DataGridTextColumn Binding="{Binding CityID}" ClipboardContentBinding="{x:Null}" Header="CityID"/>
                <DataGridTextColumn Binding="{Binding CityName}" ClipboardContentBinding="{x:Null}" Header="CityName"/>
                <DataGridTextColumn Binding="{Binding ZipCode}" ClipboardContentBinding="{x:Null}" Header="ZipCode"/>
                <DataGridComboBoxColumn x:Name="cboProvince" ClipboardContentBinding="{x:Null}" Header="ProvinceID" SelectedValuePath="ProvinceID" SelectedValueBinding="{Binding Path=ProvinceID,UpdateSourceTrigger=PropertyChanged}"  DisplayMemberPath="ProvinceName" SelectedItemBinding="{x:Null}" >
                </DataGridComboBoxColumn>
                <DataGridTextColumn Binding="{Binding DateCreated}" ClipboardContentBinding="{x:Null}" Header="DateCreated"/>
                <DataGridTextColumn Binding="{Binding DateUpdated}" ClipboardContentBinding="{x:Null}" Header="DateUpdated"/>
            </DataGrid.Columns>
        </DataGrid>
        <StackPanel Grid.Row="1" Orientation="Horizontal" HorizontalAlignment="Right" >
            <TextBlock Text="显示信息" TextAlignment="Center"  />
            <TextBox Name="txtMsg" IsReadOnly="True" Text="" Width="320" TextAlignment="Center" />
        </StackPanel>
        <WrapPanel Grid.Row="2" Orientation="Horizontal" HorizontalAlignment="Right">
            <Button  HorizontalAlignment="Right"  Name="btnRefresh" Height="22" VerticalAlignment="Top" Width="65" Click="btnRefresh_Click">刷新</Button>
            <Button  HorizontalAlignment="Right"  Name="btnUpdate" Height="22" VerticalAlignment="Top" Width="65" Click="btnUpdate_Click"  >更新</Button>
        </WrapPanel>
    </Grid>
</Window>
Code-behind for the DataGrid example
The example uses Entity Framework 6.1 to read city data from the S_City table in a local database named Test, and province data from the S_Province table. The result is then displayed in the DataGrid through data binding.
using System;
using System.Collections.Generic;
using System.Collections.ObjectModel;
using System.Data.Entity;
using System.Linq;
using System.Text;
using System.Threading.Tasks;
using System.Windows;
using System.Windows.Controls;
using System.Windows.Data;
using System.Windows.Documents;
using System.Windows.Input;
using System.Windows.Media;
using System.Windows.Media.Imaging;
using System.Windows.Shapes;
using WpfApp1.Models;
namespace WpfApp1
{
    /// <summary>
    /// WindowGrid.xaml 的交互逻辑
    /// </summary>
    public partial class WindowGrid : Window
    {
        public WindowGrid()
        {
            InitializeComponent();
            Database.SetInitializer<TestDBContext>(null);
        }
        private void btnRefresh_Click(object sender, RoutedEventArgs e)
        {
            BindDrp();
            GetData();
        }
        TestDBContext db = new TestDBContext();
        protected void GetData()
        {
            List<S_City> list = db.S_City.ToList<S_City>();
            gridCitys.ItemsSource = list;
        }
        protected void BindDrp()
        {
            List<S_Province> list = db.S_Province.ToList<S_Province>();
            cboProvince.ItemsSource = list;
            ProvinceList = list;
        }
        public List<S_Province> ProvinceList
        { get; set; }
        private void btnUpdate_Click(object sender, RoutedEventArgs e)
        {
            try
            {
                S_City city = (S_City)gridCitys.SelectedItem;
                city.DateUpdated = DateTime.Now;
                txtMsg.Text = city.ProvinceID + "//" + city.CityName;
                S_City modifyCity = db.S_City.Find(city.CityID);
                modifyCity = city;
                db.SaveChanges();
                txtMsg.Text += "保存成功!";
            }
            catch (Exception ex)
            {
                txtMsg.Text += ex.Message;
            }
        }
    }
}
After writing the code, press F5 to run the program and click the Refresh button. The first result may show extra columns generated automatically by the DataGrid.
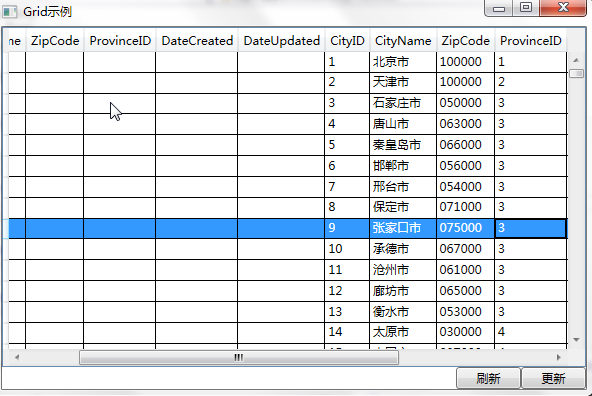
Those automatically generated columns are not needed here, so AutoGenerateColumns should be set to False. After running the program again, the grid displays only the manually defined columns.
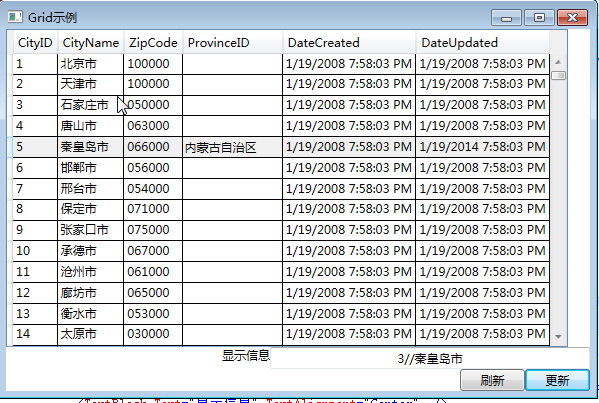
At this point, the drop-down list can be displayed, but another problem appears: the column still does not show the expected value by default. The issue is related to how DataGridComboBoxColumn is bound.
Binding a ComboBox column in DataGrid
DataGridComboBoxColumn has specific requirements for its data source. To fill the drop-down list, the ComboBox ItemsSource should be set using one of these approaches:
- A static resource, using the
StaticResourcemarkup extension. - A static code entity, using the
x:Staticmarkup extension. - An inline collection of
ComboBoxItemobjects.
In real projects, it is common to need one or more ComboBox columns inside a DataGrid. The obvious choice is DataGridComboBoxColumn, but if the column uses an ItemsSource bound to objects from code-behind, it may not work as expected without the correct binding settings.
For example, after clicking Refresh, the drop-down list initially contains no data. Looking at the XAML, there is no useful binding defined for the foreground column, and the code-behind does not yet bind the column correctly either.
<DataGridComboBoxColumn ClipboardContentBinding="{x:Null}" Header="ProvinceID" SelectedValueBinding="{x:Null}" SelectedItemBinding="{x:Null}" TextBinding="{x:Null}"/>
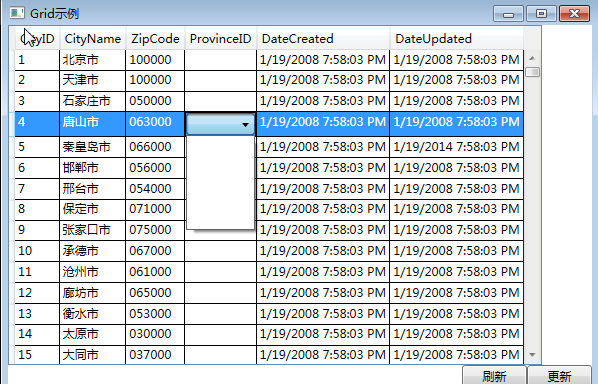
Keeping the foreground XAML unchanged:
<DataGridComboBoxColumn x:Name="cboProvince" ClipboardContentBinding="{x:Null}" Header="ProvinceID" SelectedValueBinding="{x:Null}" SelectedItemBinding="{x:Null}" TextBinding="{x:Null}"/>
The code-behind can bind the province list to the ComboBox column like this:
        protected void BindDrp()
        {
            List<S_Province> list = db.S_Province.ToList<S_Province>();
            cboProvince.ItemsSource = list;
        }
With this change, the binding succeeds, but the displayed value is still not the one we want.
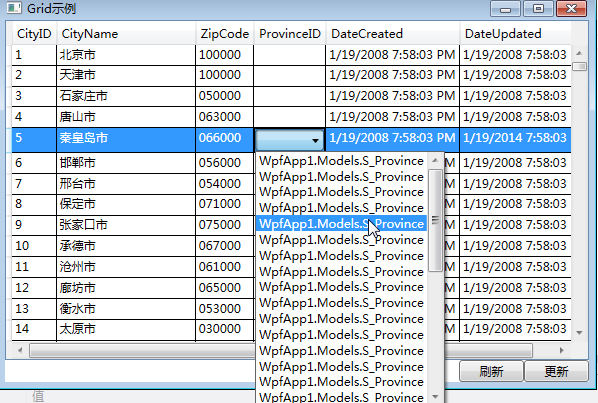
The next attempt is to bind the DataGridComboBoxColumn in XAML like this:
<DataGridComboBoxColumn x:Name="cboProvince" ClipboardContentBinding="{x:Null}" Header="ProvinceID" SelectedValuePath="ProvinceID" DisplayMemberPath="ProvinceName" SelectedItemBinding="{x:Null}" TextBinding="{Binding ProvinceName}"/>
After running the program, the drop-down list itself displays correctly. However, no matter how the value is changed, the default content shown in the DataGrid under ProvinceID remains blank.

The final working version uses SelectedValuePath, SelectedValueBinding, and DisplayMemberPath together. After this change, once the DataGrid loads the data, the ProvinceID column displays the intended province name correctly.
<DataGridComboBoxColumn x:Name="cboProvince" ClipboardContentBinding="{x:Null}" Header="ProvinceID" SelectedValuePath="ProvinceID" SelectedValueBinding="{Binding Path=ProvinceID,UpdateSourceTrigger=PropertyChanged}"  DisplayMemberPath="ProvinceName" SelectedItemBinding="{x:Null}" >
</DataGridComboBoxColumn>
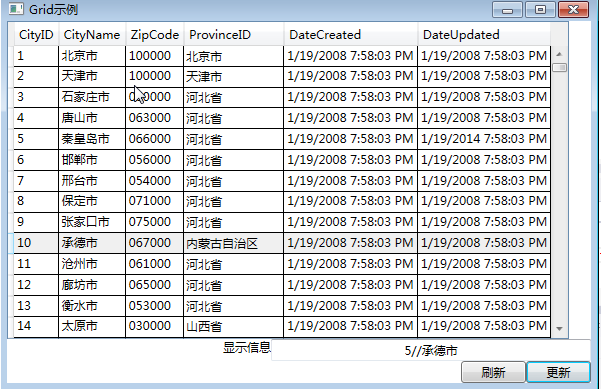
DataGrid selection modes
By default, DataGrid uses full-row selection and allows multiple rows to be selected at the same time.
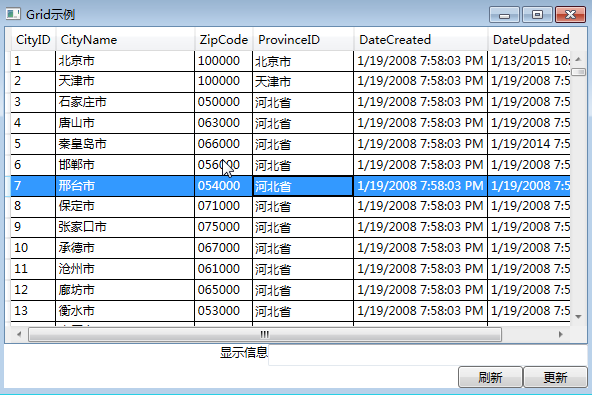
This behavior can be changed through the SelectionMode and SelectionUnit properties.
SelectionUnit controls what kind of unit can be selected:
SelectionMode controls whether one or multiple units can be selected:
SelectionUnit.</td>
</tr>
<tr>
<td>Single</td>
<td>Allows selecting only one unit, either a cell or a full row depending on SelectionUnit.</td>
</tr>
</tbody>
</table>
For example:
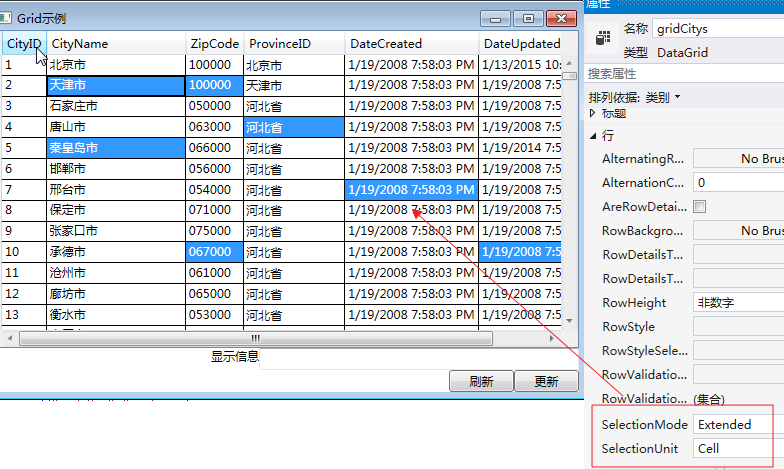
<DataGrid x:Name="gridCitys" Grid.Row="0" HorizontalAlignment="Left" VerticalAlignment="Top" AutoGenerateColumns="False" SelectionUnit="Cell" SelectionMode="Extended">
The effect is shown below.
Editing data in DataGrid
By default, the WPF DataGrid allows data to be edited directly in the grid. If editing should be disabled, the IsReadOnly property can be used to make the DataGrid read-only.
In this example, the first row is selected in the Grid示例 window.
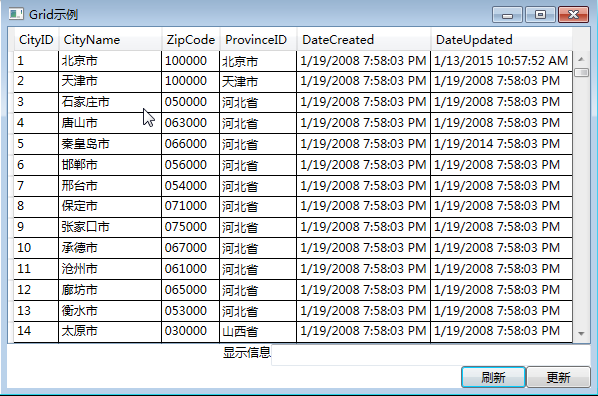
Then the ProvinceID value of the first row is modified by choosing 内蒙古自治区 from the drop-down list.
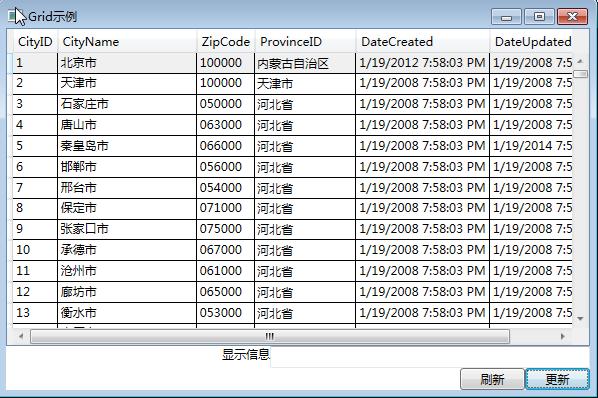
Click the Update button to save the change.
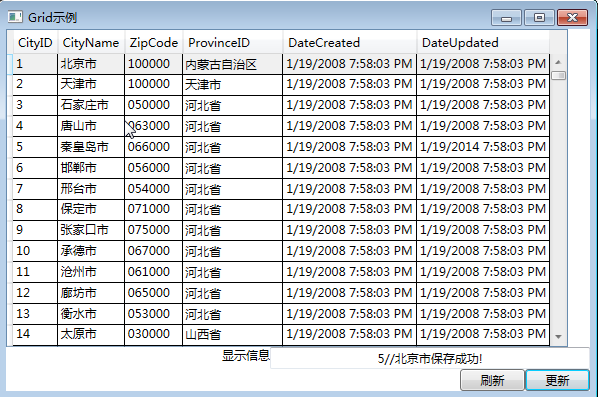
Before saving, the data appears as follows:

After saving, the edited value is written back through the update logic in the code-behind.